

Daily Maintenance
Clean the scanner on a regular basis, as described below, to maintain peak scanning quality.
-
When cleaning the scanner and the inside of the scanner, turn OFF the power and disconnect the power cord from the power outlet.
-
Do not use spray cleaners to clean the scanner. Precision mechanisms, such as the light source, may get wet, and cause a malfunction.
-
Never use paint thinner, alcohol, or other organic solvents to clean the scanner. The exterior of the scanner may become deformed, discolored, or melted. It may also cause a fire or electric shock.
Cleaning the Scanner
To clean the outside of the scanner, wipe off any dirt with a cloth that has been dampened with water and thoroughly wrung out, and then wipe the scanner dry with a clean dry cloth.
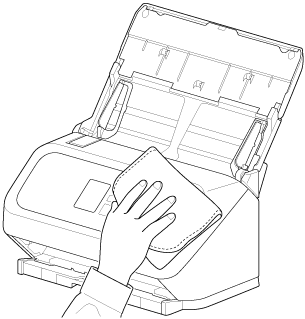
Cleaning the Display
To clean the display, use a soft dry cloth to lightly wipe the surface of the panel, without applying any pressure.
Cleaning the Inside of the Scanner
Dust or paper particles inside the scanner may cause lines or smudges to appear on scanned images. Use compressed air to periodically clean dust and paper particles from the document feed opening and the inside of the scanner. After finishing a large scanning job, turn OFF the scanner and then clean out any paper particles remaining inside the scanner.
Cleaning the paper detection sensors
Dust and dirt that collect on the sensors can cause false detections. Use a blower to periodically clean dust, etc., from the sensor areas.
-
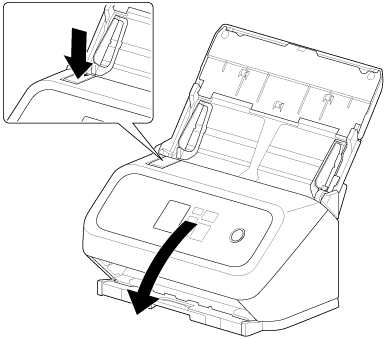
Pull the OPEN lever and pull open the front unit toward you.
-
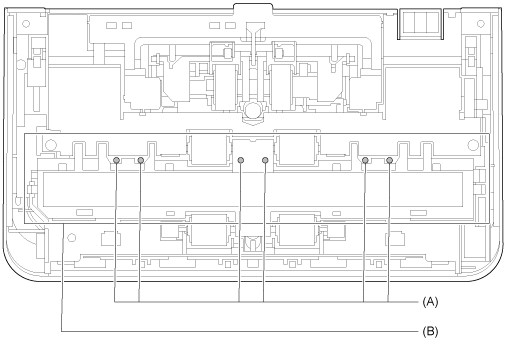
Use a blower to remove dust and dirt from the sensors (A).
When cleaning with a damp, tightly wrung out cloth, press in on the scanning unit (B) as you clean.
Inside of the Scanner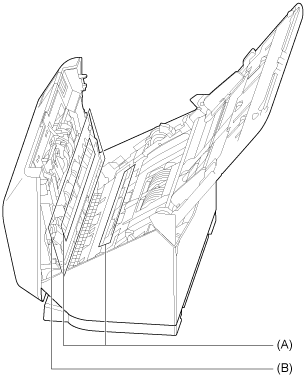 Inside of the Scanner (Front Unit)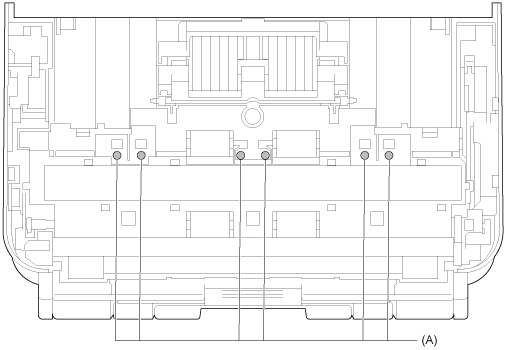
-
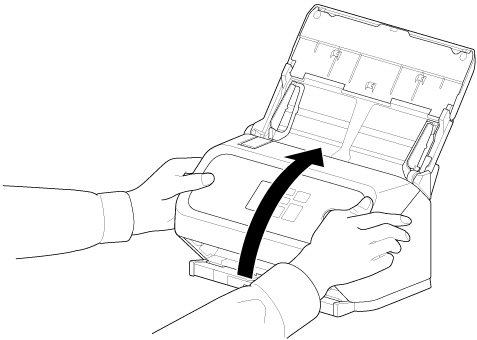
Close the front unit by gently pushing it up on both sides until it clicks into place. Make sure that the front unit is completely closed by pushing until you hear a click.
Cleaning the Sensor Glass and the Rollers
If scanned images contain streaks, or if the scanned documents become dirty, the sensor glass or rollers inside the scanner may be dirty. Clean them periodically.
-
Pull the OPEN lever and pull open the front unit toward you.
-
Use compressed air to remove dust and paper particles from the inside of the scanner.
-
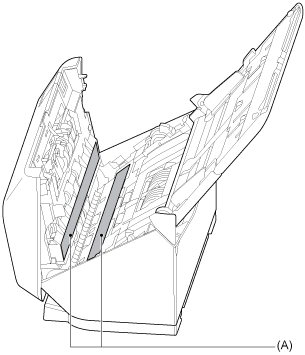
Wipe any dirt off the scanning glass (A).
Wipe any dirt off the scanning glass with a cloth that has been dampened with water and thoroughly wrung out, and then wipe the glass dry with a clean, dry and soft cloth.
Do not spray water or neutral detergent directly on the scanner. Precision mechanisms, such as the light source, may get wet, and cause a malfunction.
-
Scratches on the sensor glass may cause marks on the images, as well as feeding errors. If there are scratches on the sensor glass, contact your local authorized Canon dealer or service representative.
-
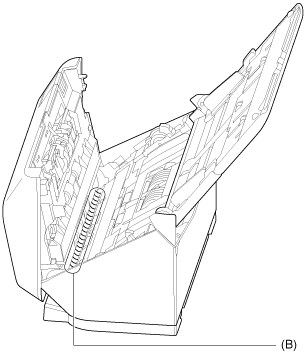
Take care to ensure the anti-static brush (B) in the front unit does not become deformed.
-
-
Clean the rollers (C).
Clean the rollers while turning them.
Wipe the rollers with a cloth that has been dampened with water and thoroughly wrung out, and then use a clean, dry and soft cloth to wipe away any moisture.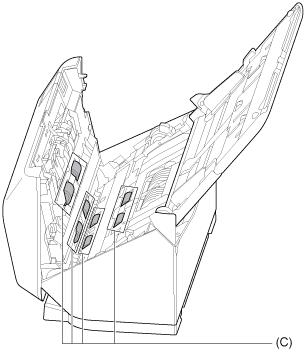
-
Remove the retard roller and feed roller.
-> Replacing the Feed Roller
-> Replacing the Retard RollerRemove the retard roller and feed roller from the scanner to clean them, and be sure to reattach them to the scanner when cleaning is finished.
-
Wipe the removed rollers with a cloth that has been dampened with water and thoroughly wrung out.
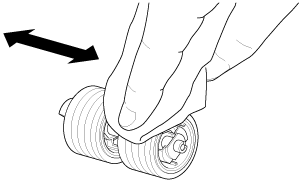
-
Reattach the retard roller and feeding roller.
-
Close the front unit by gently pushing it up on both sides until it clicks into place. Make sure that the front unit is completely closed by pushing until you hear a click.